Beranda
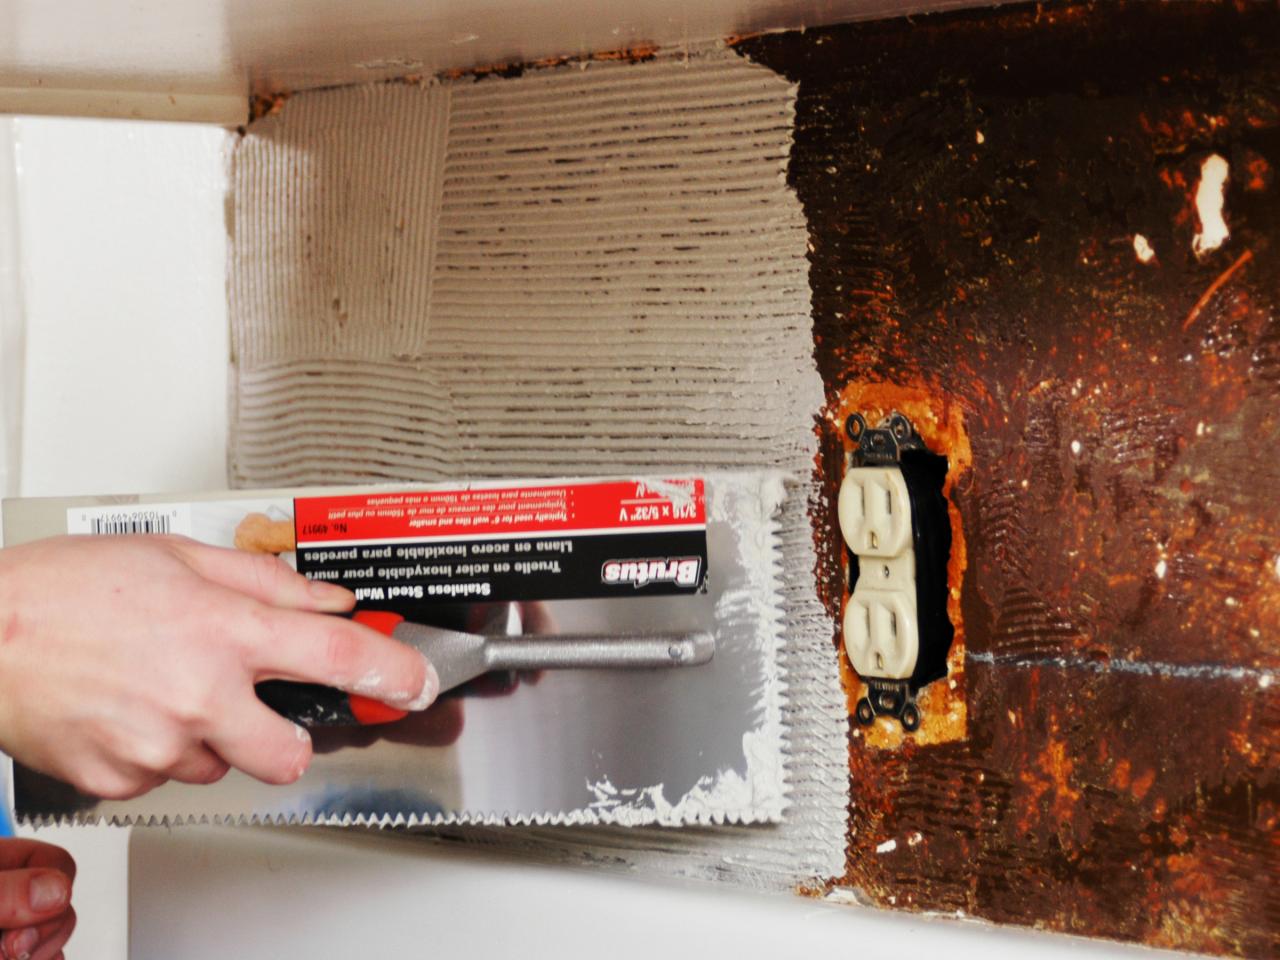
/ How To Install Kitchen Backsplash Tile : How To Install A Kitchen Backsplash The Best And Easiest Tutorial Diy Backsplash Diy Kitchen Backsplash Kitchen Design Diy - Set the tile against the wall and wiggle it a little to create suction (image 2).
How To Install Kitchen Backsplash Tile : How To Install A Kitchen Backsplash The Best And Easiest Tutorial Diy Backsplash Diy Kitchen Backsplash Kitchen Design Diy - Set the tile against the wall and wiggle it a little to create suction (image 2).
Insurance Gas/Electricity Loans Mortgage Attorney Lawyer Donate Conference Call Degree Credit Treatment Software Classes Recovery Trading Rehab Hosting Transfer Cord Blood Claim compensation mesothelioma mesothelioma attorney Houston car accident lawyer moreno valley can you sue a doctor for wrong diagnosis doctorate in security top online doctoral programs in business educational leadership doctoral programs online car accident doctor atlanta car accident doctor atlanta accident attorney rancho Cucamonga truck accident attorney san Antonio ONLINE BUSINESS DEGREE PROGRAMS ACCREDITED online accredited psychology degree masters degree in human resources online public administration masters degree online bitcoin merchant account bitcoin merchant services compare car insurance auto insurance troy mi seo explanation digital marketing degree floridaseo company fitness showrooms stamfordct how to work more efficiently seowordpress tips meaning of seo what is an seo what does an seo do what seo stands for best seotips google seo advice seo steps, The secure cloud-based platform for smart service delivery. Safelink is used by legal, professional and financial services to protect sensitive information, accelerate business processes and increase productivity. Use Safelink to collaborate securely with clients, colleagues and external parties. Safelink has a menu of workspace types with advanced features for dispute resolution, running deals and customised client portal creation. All data is encrypted (at rest and in transit and you retain your own encryption keys. Our titan security framework ensures your data is secure and you even have the option to choose your own data location from Channel Islands, London (UK), Dublin (EU), Australia.
How To Install Kitchen Backsplash Tile : How To Install A Kitchen Backsplash The Best And Easiest Tutorial Diy Backsplash Diy Kitchen Backsplash Kitchen Design Diy - Set the tile against the wall and wiggle it a little to create suction (image 2).. Adding a unique tile backsplash. Measure your wall to determine the amount of tile you need. Check out our guide to learn more about installing tile backsplash: Do not grout the bottom seam where the tile meets the countertop, you'll want to use caulk in that seam. Use your trowel to smooth the tile adhesive across the wall, working in small sections.
If the tiles are too heavy, the tile adhesive won't be able to hold the tiles and they will fall. Use your trowel to smooth the tile adhesive across the wall, working in small sections. Lightly wipe down your backsplash with a damp sponge to remove any dust or debris before you begin grouting. Set the tile in the cutter and adjust it to the desired measurement. The square footage determines how much tile is necessary for tiling a backsplash in a kitchen.
How To Install A Tile Backsplash How Tos Diy from diy.sndimg.com Do not touch or clean the tiles during this time. One stop shopping experience this kitchen renovation has been nothing short of exhausting but seriously so rewarding at the same time. Benefits of installing a kitchen tile backsplash. Installing tile backsplash is an easy, thrifty, and beautiful way to update your kitchen or bathroom. If you apply too much at once, it will begin to dry before you get a chance to attach the tiles. It scores the tile first and by pressing the bar down, the machine actually snaps the tile at the score line (be sure to purchase some extra tile in case of mistakes). Set the tile against the wall and wiggle it a little to create suction (image 2). So if your kitchen's got the blahs, give it a quick infusion of pizzazz with kitchen backsplash tile.
Do not touch or clean the tiles during this time.
With one weekend and a lot of hard work, we transformed a plain, white wall into a. With hexagon tiles, you have to cut them to get a flat edge where your backsplash ends. One stop shopping experience this kitchen renovation has been nothing short of exhausting but seriously so rewarding at the same time. The beautiful appearance of backsplash tile is only one of the many benefits. If you only have one section to cover, multiply the width and height of the wall to get the square footage. Level of difficulty 2 out of 5. Lowe's independent installers will handle installing tile backsplash from start to finish, including cleanup. Begin by measuring the height and width of the backsplash to determine the square footage and thus, how much tile you'll need. Use a dry tile cutter to cut the tiles to size. Not only do you end up with some amazing treats after all that. The adhesive tile mat we used worked really well, but there is a similar product you can buy at home depot or lowes. Your kitchen is a place for you to let loose and try new recipes. For consistent grout lines insert spacers between tiles.
Learn how to install tile backsplash with this easy diy tutorial. Do not grout the bottom seam where the tile meets the countertop, you'll want to use caulk in that seam. So we opted for metal tile edging to complete the backsplash. Your kitchen is a place for you to let loose and try new recipes. The third project in this kitchen remodel:
Beautiful Tile Backsplash Installation In Bloomington Indiana Bounds Flooring Inc from boundsflooring.com So we opted for metal tile edging to complete the backsplash. Not only do you end up with some amazing treats after all that. I am still super impressed with how easy the kitchen backsplash tile was to install thanks to the adhesive tile mat. The adhesive tile mat we used worked really well, but there is a similar product you can buy at home depot or lowes. Use the float to take off any excess grout then allow the grout to set for 10 minutes. How to install backsplash project overview: Use your trowel to smooth the tile adhesive across the wall, working in small sections. Planning, materials and tools nothing packs more style per square inch than mosaic tile for kitchen backsplash tile ideas.
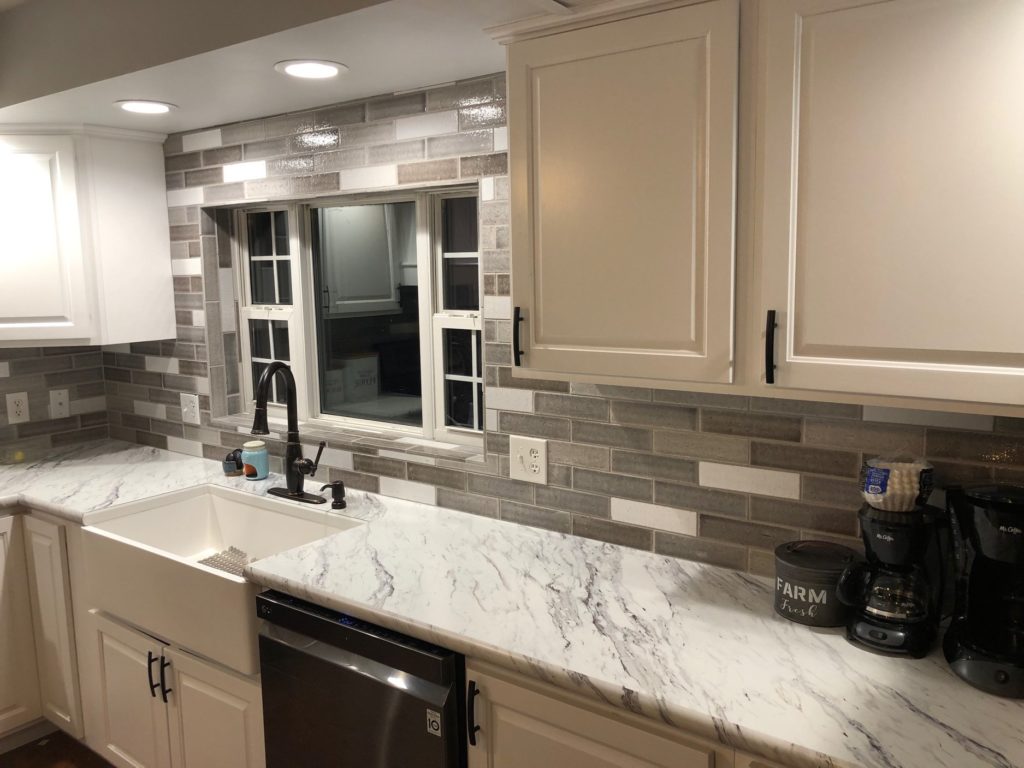
Here's how the kitchen looks before we install backsplash using adhesive tile mat and the blue glass tile backsplash:
Begin by measuring the height and width of the backsplash to determine the square footage and thus, how much tile you'll need. Start the installation at the most visible part of the backsplash. It scores the tile first and by pressing the bar down, the machine actually snaps the tile at the score line (be sure to purchase some extra tile in case of mistakes). Measure your wall to determine the amount of tile you need. Set the tile in the cutter and adjust it to the desired measurement. Do not grout the bottom seam where the tile meets the countertop, you'll want to use caulk in that seam. Use the float to take off any excess grout then allow the grout to set for 10 minutes. Benefits of installing a kitchen tile backsplash. Always start applying your tiles from the bottom center, and working outwards from there. With one weekend and a lot of hard work, we transformed a plain, white wall into a. The square footage determines how much tile is necessary for tiling a backsplash in a kitchen. Wait for the thinset to cure for a full 48 hours. The adhesive tile mat we used worked really well, but there is a similar product you can buy at home depot or lowes.
Prep the wall, apply the thinset, and install the tile. A kitchen backsplash is a great way to add value and style to the kitchen space. The third project in this kitchen remodel: Do not touch or clean the tiles during this time. Using a measuring tape, measure the length and the height of the wall then multiply these two to get the total area.
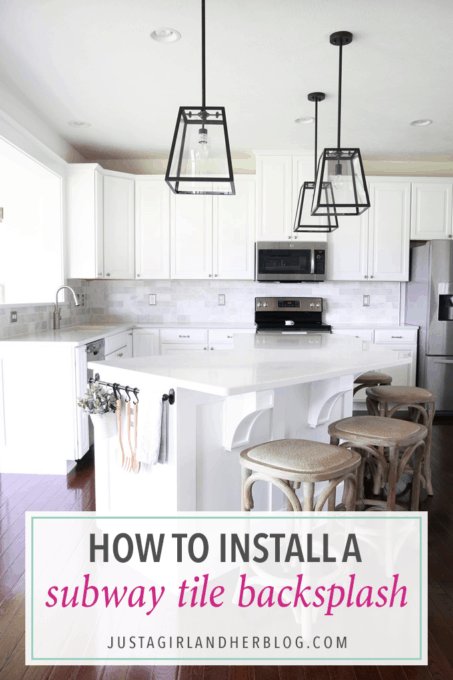
How To Install A Marble Subway Tile Backsplash Abby Lawson from justagirlandherblog.com Prior to preparing your walls for the installation of your tile backsplash, make sure to measure your wall accurately to determine the amount of tiles that you need to cover the area. After receiving contractor bids to tile our kitchen backsplash that didn't fit our budget, my husband and i decided to tackle the project ourselves. There are many gorgeous choices available and many ways to apply them. From what i am hearing, anyone else who has installed tile using this method, said that the adhesive has held up. Proper measurements will help keep tile installation costs down. Level of difficulty 2 out of 5. Not only do you end up with some amazing treats after all that. How to install a simple subway tile kitchen backsplash.
Do not grout the bottom seam where the tile meets the countertop, you'll want to use caulk in that seam.
Here's how to install a tile backsplash in your kitchen. Lowe's can help with installing backsplash in your kitchen and bath. With hexagon tiles, you have to cut them to get a flat edge where your backsplash ends. The beautiful appearance of backsplash tile is only one of the many benefits. Wait for the thinset to cure for a full 48 hours. After receiving contractor bids to tile our kitchen backsplash that didn't fit our budget, my husband and i decided to tackle the project ourselves. It scores the tile first and by pressing the bar down, the machine actually snaps the tile at the score line (be sure to purchase some extra tile in case of mistakes). Using a measuring tape, measure the length and the height of the wall then multiply these two to get the total area. It's simpler than you may think. Always start applying your tiles from the bottom center, and working outwards from there. We used this bullnose edging around the outer corners, and this flat edging along the sides and top of the backsplash. Start the installation at the most visible part of the backsplash. Installing a tile backsplash in your kitchen steve watson and the don't sweat it crew take on a kitchen makeover for a busy family of three.